Stop hiding your neck and start healing your posture today! Dealing with that pesky curve isn't just about looks; it's about feeling your best. I’ve broken down the most effective exercises for dowager's hump into a simple, do-anywhere routine that actually works. Let’s get that confidence back!
What's Inside:
Phase 1: Know Your Enemy (So You Can Beat It)
Before we jump into the moves, let's get real about what's happening back there. That “bump” isn't a permanent sentence; it’s actually your body trying to help you.
Think of it as a protective cushion. When your head constantly drifts forward—thanks to our phones and laptops—your spine gets stressed.1 To handle the extra weight of your head, your body builds up a pad of fat and tissue. It’s trying to shore up the foundation!
The Ripple Effect: Why You Shouldn't Ignore It
Sure, we all want to look good in a tank top, but dowager's hump correction exercises are about so much more than aesthetics. Ignoring that curve can set off a chain reaction in your body:
- Constant Aches: That nagging stiffness in your neck and shoulders? That's the tension talking.1
- Feeling Stuck: It literally limits how freely you can look over your shoulder.2
- Brain Fog & Headaches: All that neck strain often travels up, leading to tension headaches.2
- Breathing Issues: In severe cases, hunching over actually cramps your lungs' style.3
Check Yourself: The “Root Cause” List

To truly fix this, we have to stop feeding the problem. Are you guilty of any of these common causes of dowager's hump?
- The Tech Trap: Staring down at screens for hours (hello, “Tech Neck”).4 (Speaking of which, check out this guide on Tech Neck Fixes to catch it early!)
- The Pillow Problem: Sleeping on giant, fluffy pillows that force your head forward all night.5
- The Muscle Imbalance: Strong chest muscles (from hunching) overworking weak back muscles.
⚠️ Smart Coach Safety Tip: While I love a good DIY fix, please chat with your doctor before starting if you have a history of spinal fractures, osteoporosis, or if you feel tingling in your arms. Safety first, always!
The “Anti-Hump” Toolkit
You don't need a gym membership, but a few smart tools can speed up your results. Here is what I use:
- Must-Have: A Thick, Non-Slip Yoga Mat. Don't bruise your spine on the hard floor!
- The Release Squad: A Vibrating Massage Ball (a game changer) and a Foam Roller.
- The Strength Builder: Pull-Up Assistance Bands for deep resistance.
Phase 2: The Reversal Routine
Ready to take action? This routine is your new best friend. Aim for 3-4 times a week. The secret sauce is the order: Release > Mobilize > Strengthen.
Step 0: The Great Release
Don't skip this! You can't strengthen a muscle that is locked tight. We need to melt that fascia first.6
The Fix: Take that Vibrating Massage Ball and place it right between your shoulder blades against a wall or the floor. Let the vibration do the heavy lifting for 60 seconds to break up the tension.
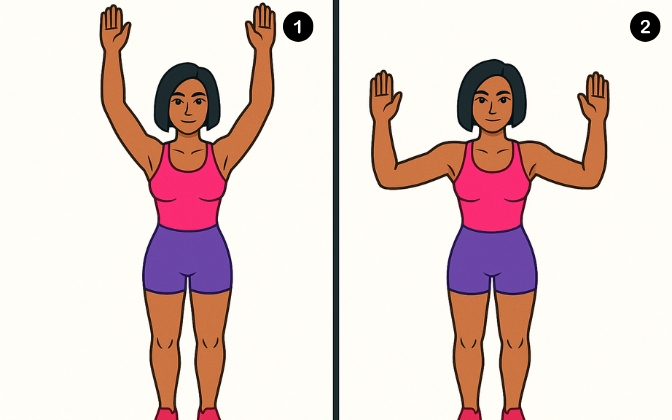
Quick Warm-Up
Get the blood flowing! Do a few gentle arm circles and neck rolls. Think of it as waking your spine up before the workout.
1. The “Double Chin” Tuck (Neck Reset)
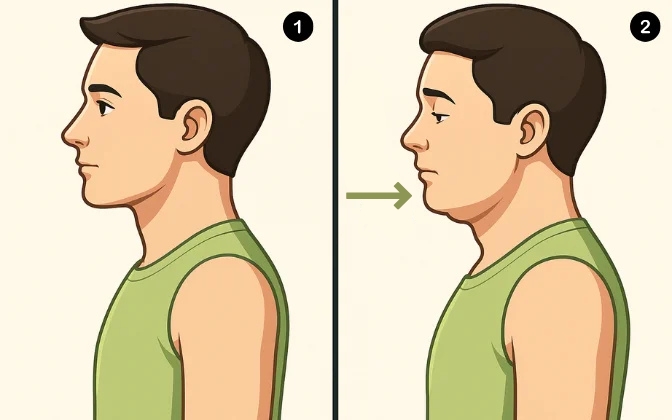
This is arguably the most important move for realigning the head.4
- Do it right: Stand tall and slide your chin straight back, like you're trying to touch the back of your neck to a wall behind you. You want a “double chin” moment here.
- Feel it: You should feel a deep stretch at the base of your skull.
- Reps: Hold for 3-5 seconds. Do 10-15 reps.
- Pro Tip: Don't look down! Keep your eyes on the horizon. (Want more facial structure tips? Try these Face Yoga exercises next!)
2. Scapular Squeezes (The Anti-Slouch)
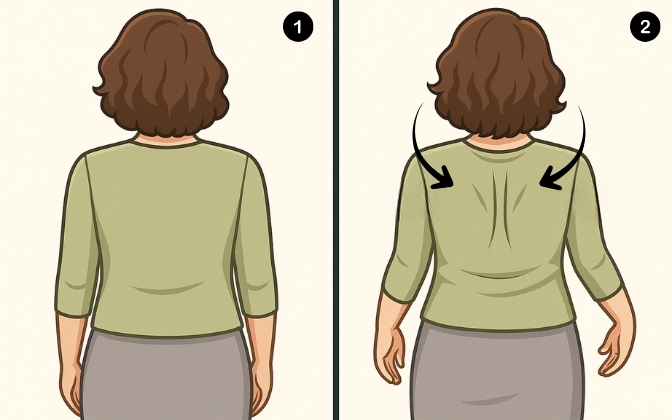
Wake up those sleeping upper back muscles!7
- Do it right: Arms by your sides. Imagine you have a pencil between your shoulder blades and try to squeeze it by sliding your blades back and together.
- Avoid: Don't shrug your shoulders up to your ears!
- Reps: Hold for 5 seconds. Repeat 10-12 times.
- Looking for more relief in this area? These 6 shoulder blade moves are a perfect add-on.
3. Wall Angels (The Mobility Test)
This one looks easy but is surprisingly humble!
- Do it right: Stand with your back glued to a wall. Put your arms up like a goalpost (90 degrees). Try to keep your elbows and wrists touching the wall as you slide your arms up and down.
- Reps: 10 slow, controlled slides.
- The Struggle: If your wrists pop off the wall, that’s okay! It just means you have room to improve.
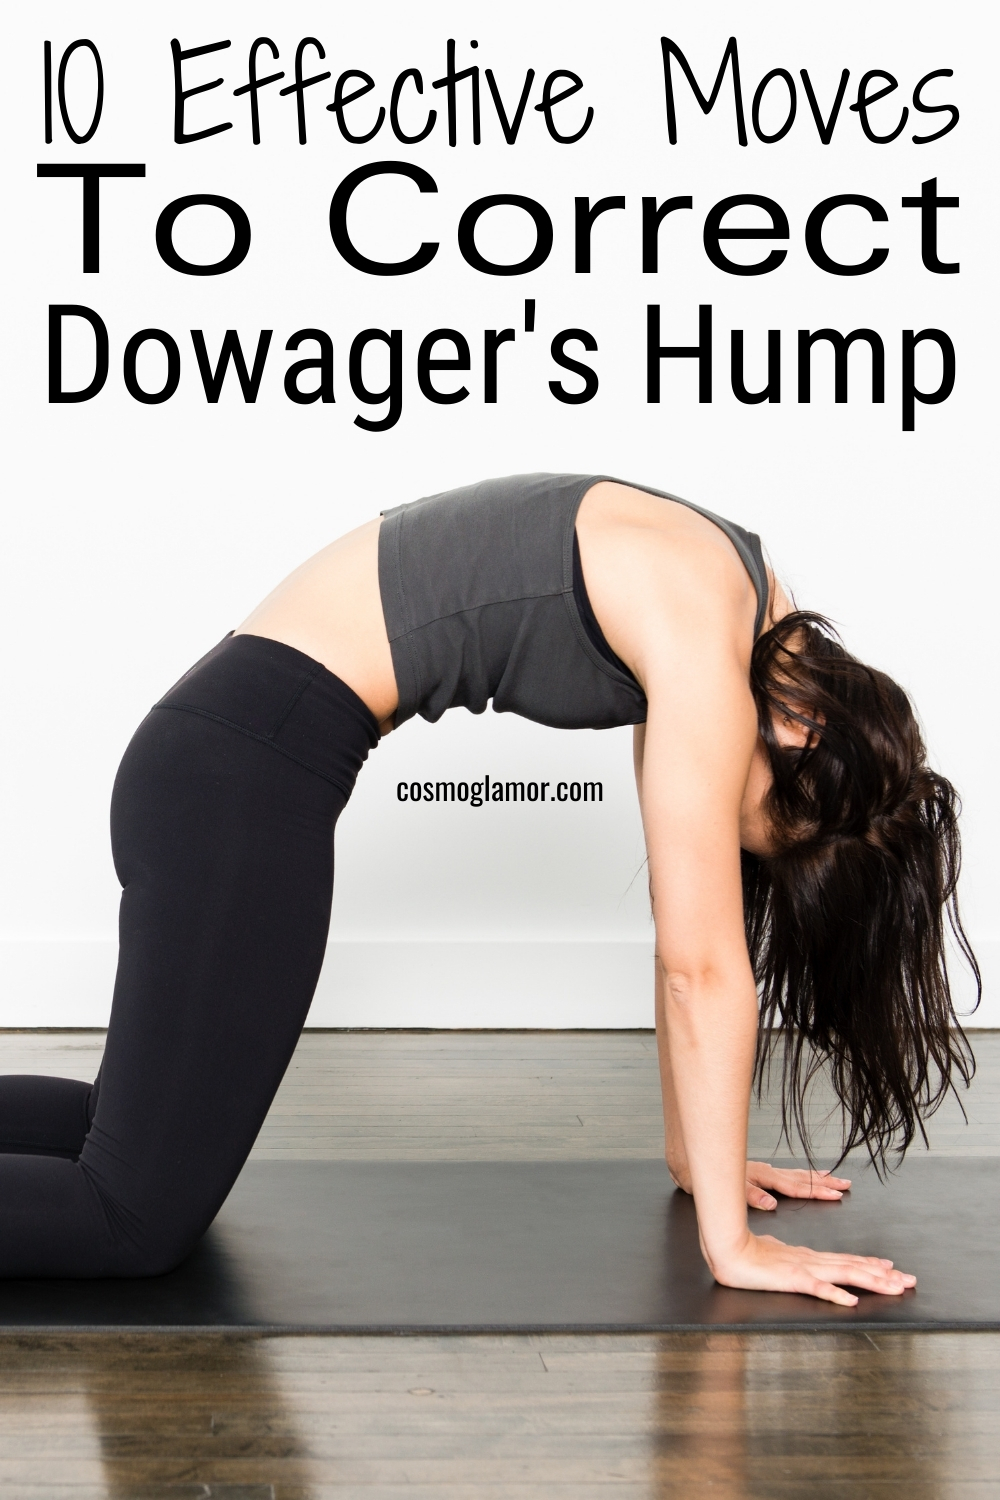
4. Thoracic Rolling (Spine Opener)
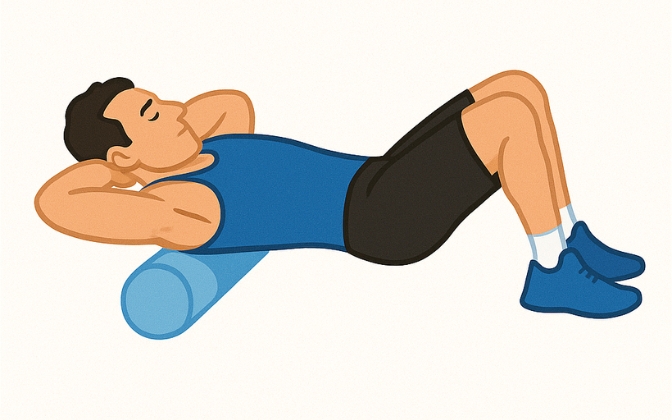
Time to iron out the curve.8
- Do it right: Lie back with a foam roller under your mid-back (thoracic spine). Support your head with your hands to keep your neck safe. Gently roll up and down from mid-back to shoulders.
- Duration: 1-2 minutes of bliss (or “good pain”).
- Gear Note: Start with a Medium-Density Roller if you're sensitive.
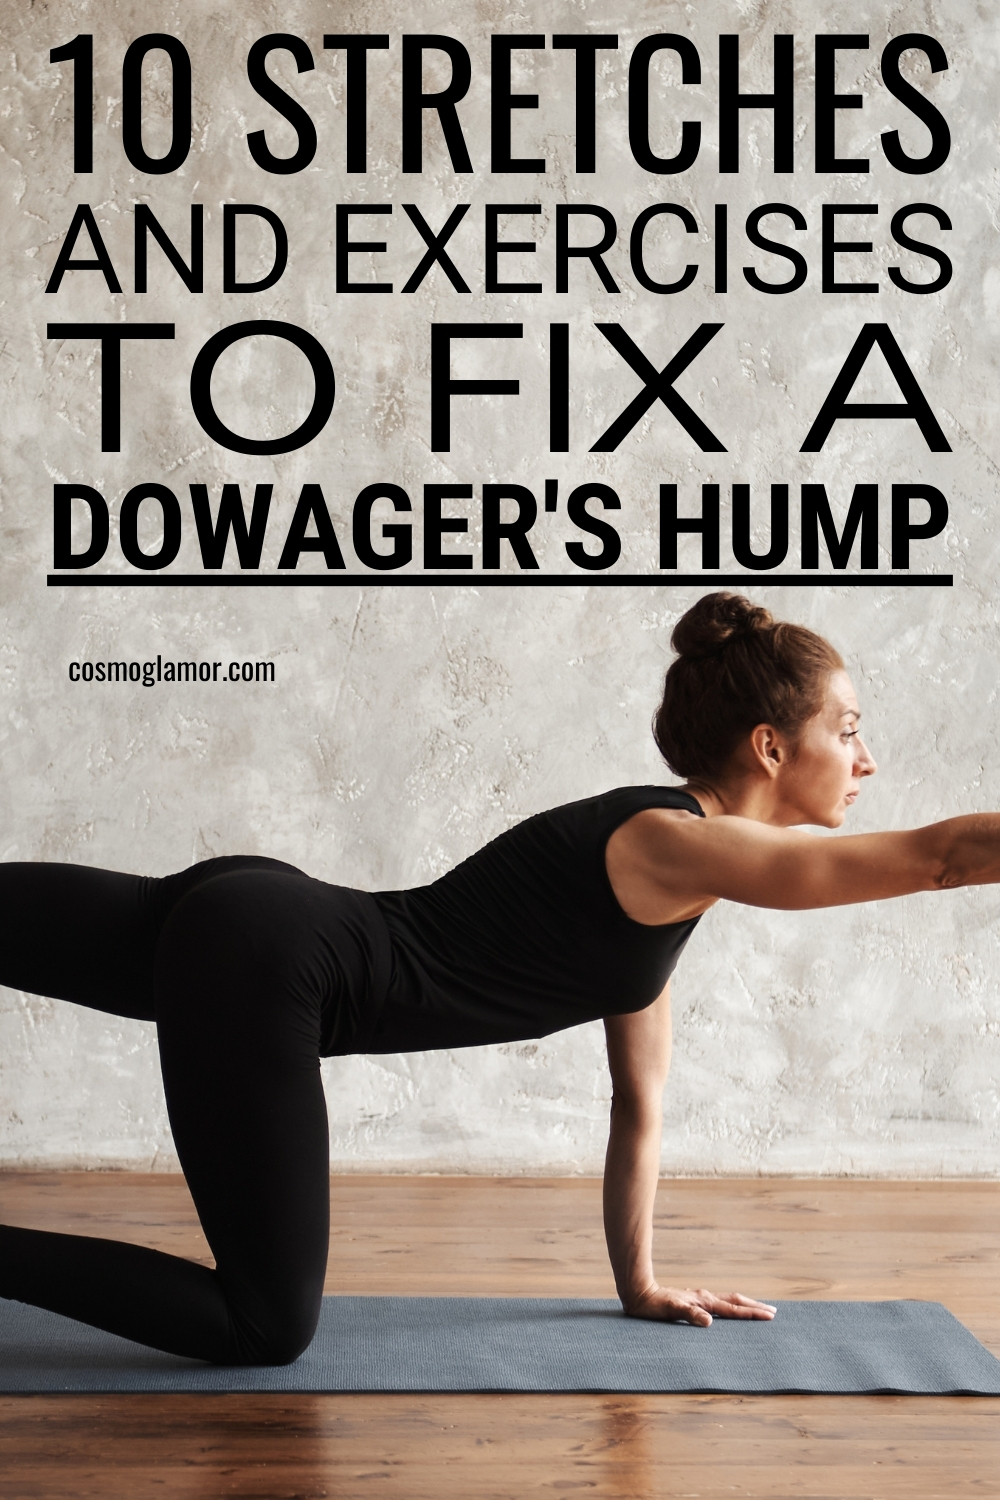
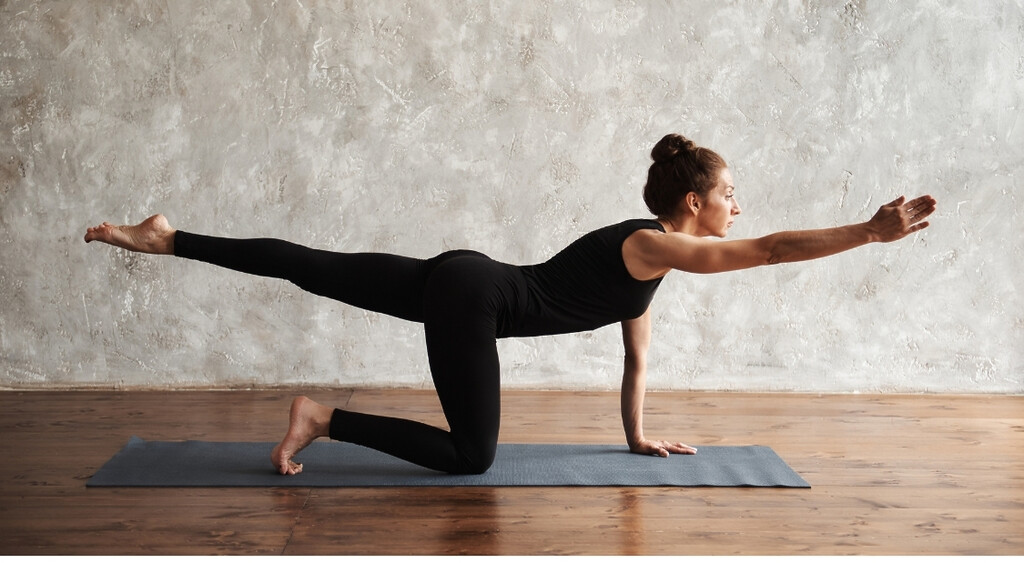
5. Bird Dog (Core Stability)
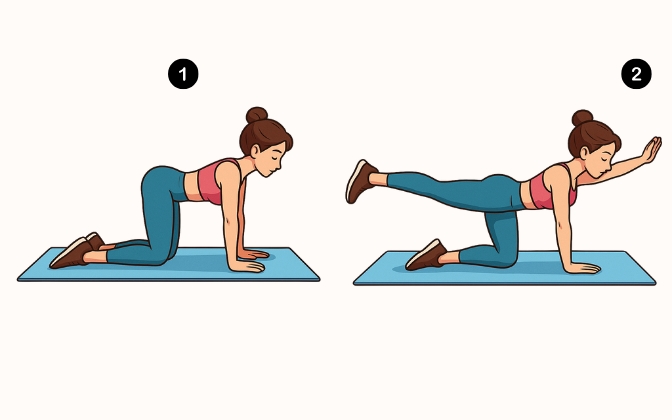
Balance is key for a healthy spine.
- Do it right: On hands and knees, reach your right arm forward and left leg back. Create a straight line from finger to heel.
- Focus: Imagine balancing a hot cup of coffee on your lower back—don't spill it!
- Reps: 10 reps per side.
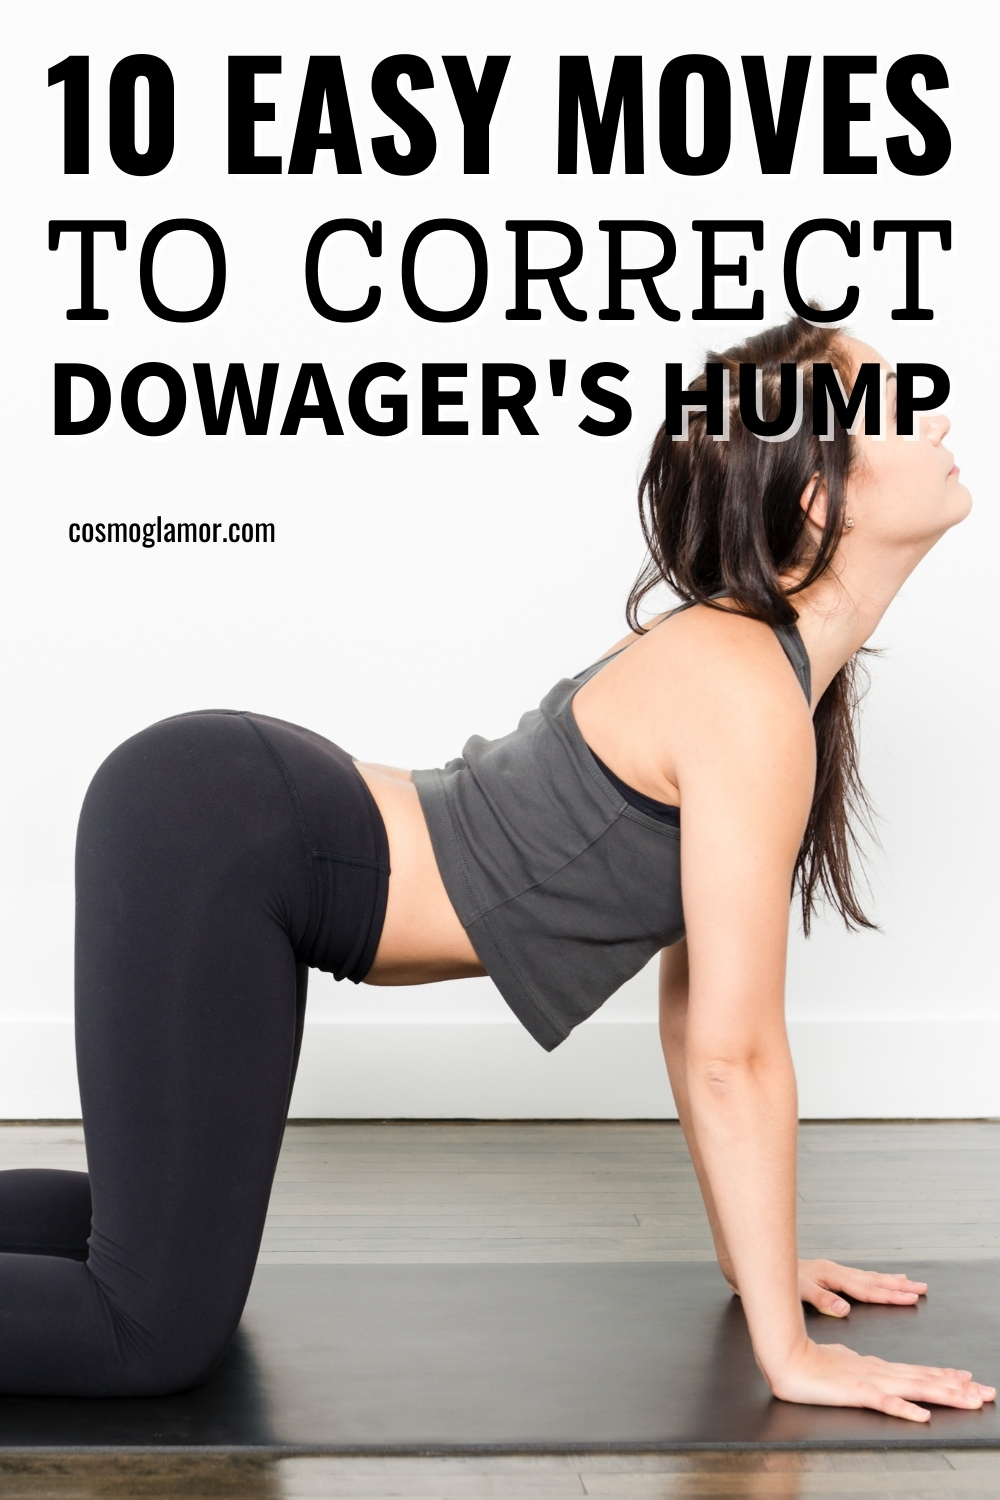
6. Cat-Cow Flow (Lubricate the Joints)
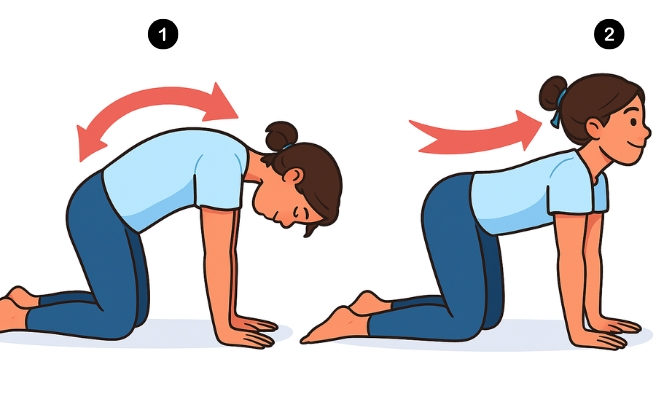
This feels amazing after a long day at a desk.
- Do it right: On all fours, inhale and drop your belly (Cow). Exhale, arch your back like a scared cat and tuck your chin (Cat).
- Flow: Move with your breath. It should feel fluid, not robotic.
- Reps: 10-15 cycles.
7. Band Pull-Aparts (The Posture Builder)
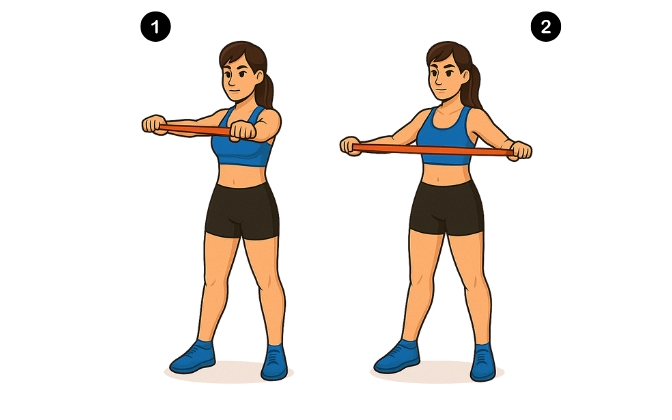
Let's add some resistance to strengthen that correction.7
- Do it right: Hold a resistance band in front of you with straight arms. Pull your hands apart until the band touches your chest, squeezing your shoulder blades together.
- Reps: 12-15 reps.
- Pro Tip: Use Pull-Up Assistance Bands for better stability than flimsy tube bands.
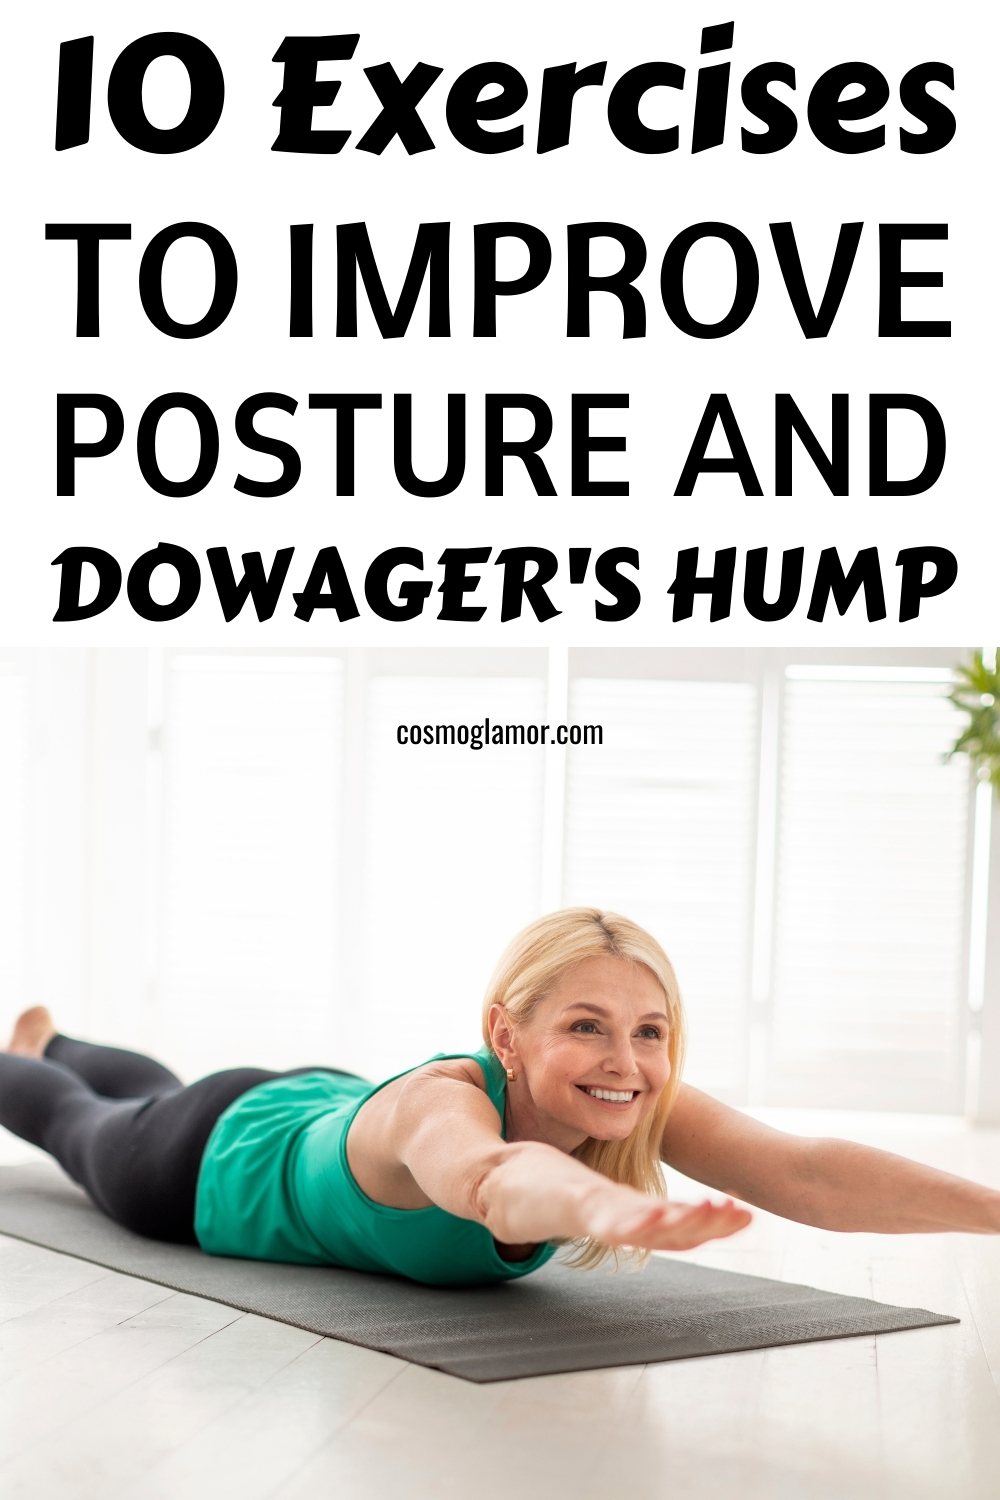
8. Prone Y and T (Targeting Lower Traps)

This targets the muscles often ignored by standard workouts.
- Do it right: Lie on your belly. Make a “Y” with your arms and lift them. Lower, then make a “T” and lift again.
- Key: Keep your thumbs pointing up to the ceiling to open the shoulders.
- Reps: 10-12 reps of each letter.
9. The Superman (Full Chain Strengthener)
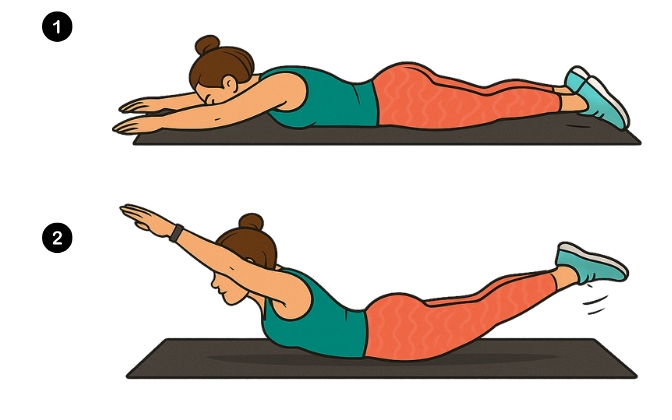
You're flying! Well, sort of.
- Do it right: On your stomach, lift your arms, chest, and legs off the ground simultaneously.
- Hold: Count to 3 at the top.
- Reps: 10-15 reps.
10. The Doorway Open (Chest Stretch)
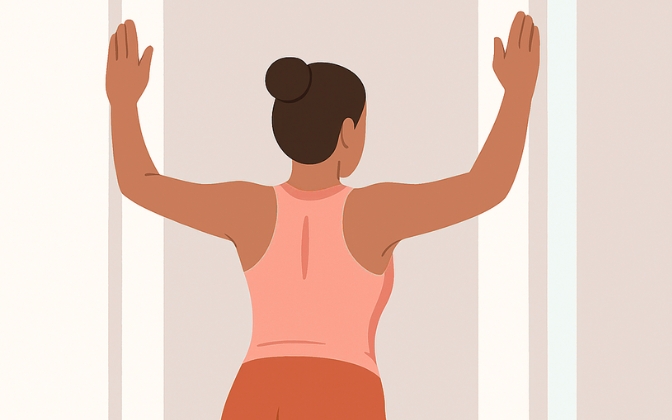
Finish with a deep opening stretch.
- Do it right: Stand in a door frame. Place forearms on the frame at shoulder height (90-degree elbows). Step one foot through until you feel the stretch across your chest.
- Hold: Breathe deeply for 20-30 seconds.
📌 Save This for Later!
Feeling better already? Don't lose this routine! Pin this to your Health & Wellness board so you can find it next time your neck feels tight.
Phase 3: The “23-Hour” Rule (Speed Up Results)
Here is the hard truth: You can't fix your posture with 20 minutes of exercise if you spend the other 23 hours hunching. How to reverse dowager's hump fast? You have to optimize your downtime.
- Fix Your Sleep (8 Hours): If you wake up stiff, your pillow is the enemy. An Orthopedic Cooling Pillow restores your neck's natural C-curve while you dream.5
- Fix Your Work (8 Hours): Stop looking down! Use an Adjustable Laptop Stand to get that screen to eye level. A Memory Foam Seat Cushion can also help align your hips, which naturally straightens the spine.
- The Daily Reset (10 Minutes): Gravity compresses us all day. Spend 10 minutes on a Cervical Traction Neck Relaxer to gently decompress the vertebrae.9 It’s like a mini-vacation for your neck.
FAQ: Your Questions, Answered
Can you really get rid of a dowager's hump?
Yes! In most cases, especially if it's caused by posture (tissue and fat buildup), it is reversible with consistent exercise and posture correction.10 Bone changes (like osteoporosis) are harder to reverse but can still be managed.
How long does it take to fix a dowager's hump?
Patience is key. With daily commitment to these exercises and lifestyle tweaks, you can typically see visible improvements in posture and reduction in the “hump” within 3 to 6 months.10
Does walking help dowager's hump?
Walking is great for overall health, but only if you walk with good posture! Walking while looking down at your phone won't help. Focus on keeping your head up and shoulders back while you move.
Is it too late to fix my hump at 60?
It is rarely too late to improve! While younger bodies adapt faster, you can improve mobility, reduce pain, and strengthen your posture at any age.10 Just listen to your body and start slow.
Final Thoughts from Your Coach
You've got the tools, the plan, and the motivation. Remember, consistency beats intensity. Doing these exercises for dowager's hump imperfectly a few times a week is infinitely better than doing nothing at all.
Stand tall, you've got this!
References
- Forward Head Posture and Neck Pain (Systematic Review & Meta-Analysis)
- Cervicogenic Headache in Forward Head Posture (Cross-Sectional Study)
- Kyphosis Severity and Decline in Lung Function (Framingham Study)
- Neck Retraction Exercises and Forward Head Posture in Screen-Time Users (Pilot RCT)
- Ergonomic Latex Pillow Effects on Head and Neck Posture (RCT)
- Foam Rolling Effects on Flexibility and Muscle Pain (Meta-Analysis)
- Scapular Stabilization Plus Thoracic Extension for Forward Head Posture (Randomized-Controlled Trial)
- Thoracic Mobilization and Extension Exercise Improving Thoracic Alignment (Randomized Pilot Study)
- Cervical Traction and Intervertebral Distraction (Randomized Controlled Trial)
- Spine-Strengthening Exercise and Posture Training to Reduce Hyperkyphosis (6-Month RCT)
- Save for Later345.0K


6 Responses
Thank you. I hope to do these things
That’s wonderful to hear! I’m so glad you found the article helpful. Taking that first step of wanting to do them is a fantastic start. You’ve got this, and I’m rooting for you on your journey to a healthier posture! Let me know if any questions come up as you get started.
Thank you for this article! While I eat well, and I’m in pretty good shape, my posture changed after a car accident where I experienced whiplash and was in a fair amount of pain for about 2.5 years. Thanks to people like you sharing info online, I used targeted strength training to fix the issues causing me pain, but my posture is still off, so I’m trying to correct it. I already do some of these exercises as part of my regimen from my accident, but I’m hoping that adding the others makes a difference for me. Between the accident and peri-menopause, I feel like my body is fighting against me, but I’m determined to figure it out. Thank you for sharing.
Thank you so much for sharing your story. Overcoming 2.5 years of pain after an accident like that shows incredible strength and resilience. It’s amazing that you’ve been so proactive in your own recovery.
That feeling of your body fighting against you, especially when you’re navigating perimenopause on top of everything else, is so real and can be incredibly frustrating. Your determination to figure it out is truly inspiring. I’m very hopeful that adding these new movements will give your body the gentle signals it needs to find its alignment again. Wishing you the very best on your journey.
Thank you for these! I’ll start these too!
I have kyphosis and Lordosis since 5th grade, wore 23 hour back brace for 3 years. It helped but I still have it.
I feel so much tension in my upper back. I’m excited to feel some relief from these.
Wow, thank you so much for sharing your journey with this. Dealing with kyphosis since childhood and wearing a brace for that long sounds incredibly challenging. That constant tension in the upper back can be so draining, and I’m really hopeful that these gentle movements can help bring you some of the relief you’re looking for. Just remember to start slow and listen to your body. Wishing you all the best!