
We spend decades trying not to express too much emotion to avoid wrinkles, which is a bit like putting a cast on a healthy arm and wondering why it loses tone. Your face has 43 muscles, and just like the rest of your body, they respond to targeted resistance. If you are looking for effective face yoga exercises, the secret isn't just making funny faces in the mirror—it is learning how to isolate the muscle without dragging the delicate skin on top.
Jump to the 9-step face yoga routine
When I spent 18 months redesigning my lifestyle to drop 50 pounds and lower my blood pressure, I learned that functional movement fixes a lot more than just my chronic back pain. Biomechanics apply everywhere. The muscles in your face can atrophy and sag, or they can be engaged and lifted. Some research suggests that a consistent routine of facial exercises can improve mid-face fullness and soften the appearance of fine lines, simply by building up the structural support underneath your skin.
Before you start pulling at your cheeks, there is one non-negotiable rule: you must use a facial oil. Squalane, jojoba, or rosehip work perfectly. If your fingers catch or drag the skin at all, you risk creating the very creases you want to avoid. Apply a few drops to a clean face, take a breath, and let's engage those muscles.
The 9-Step Face Yoga Routine
This sequence is designed as a complete face yoga for beginners protocol. Move through these from the top of your face downward, keeping your breathing steady. Always consult your dermatologist before massaging your face if you have active acne, rosacea, or recent cosmetic injectables, as firm pressure can spread bacteria or shift fillers.
1. The Forehead Smoother (Frontalis Muscle)
Place both hands on your forehead facing inward, spreading your fingers out from your hairline down to your eyebrows. Gently sweep your fingers outward toward your temples, applying firm pressure to the muscle underneath. Anchoring the muscle against the bone here helps release the tension that causes horizontal forehead lines.
Reps: Sweep outward 10 times, holding the final stretch at the temples for 5 seconds.

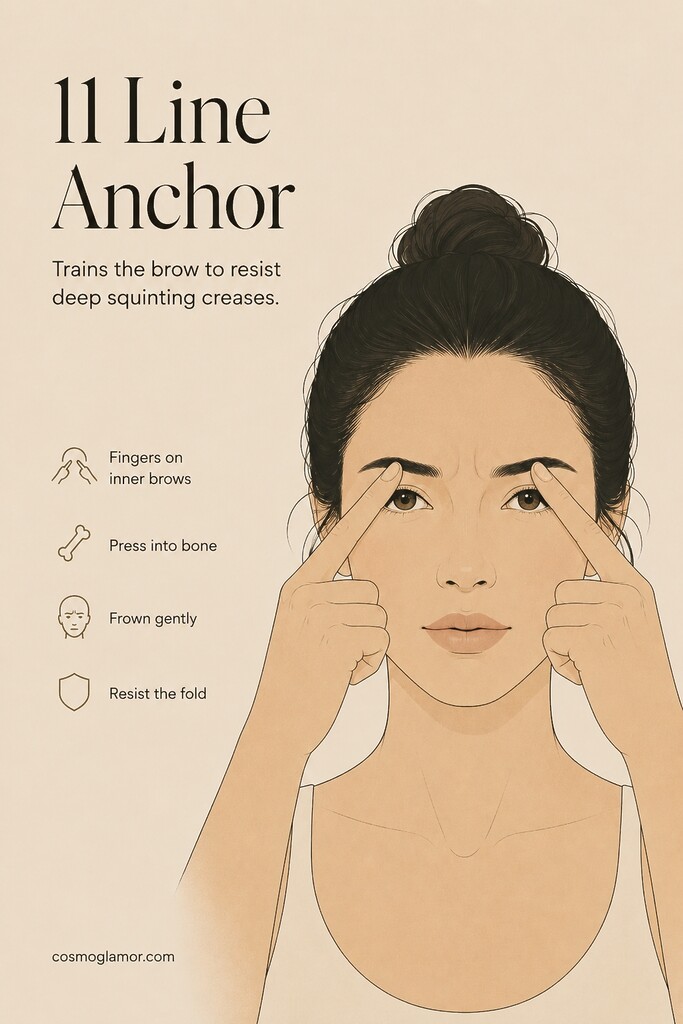
2. The “11” Line Anchor (Procerus & Corrugator)
Those two vertical lines between your eyebrows come from squinting and concentrating. Place your index fingers right at the inner corners of your eyebrows. Press firmly into the bone, then consciously try to frown and bring your eyebrows together. Your fingers should act as weights, resisting the muscle movement so the skin cannot fold.
Reps: Pulse the frown against your fingers 10 times. Relax and breathe.
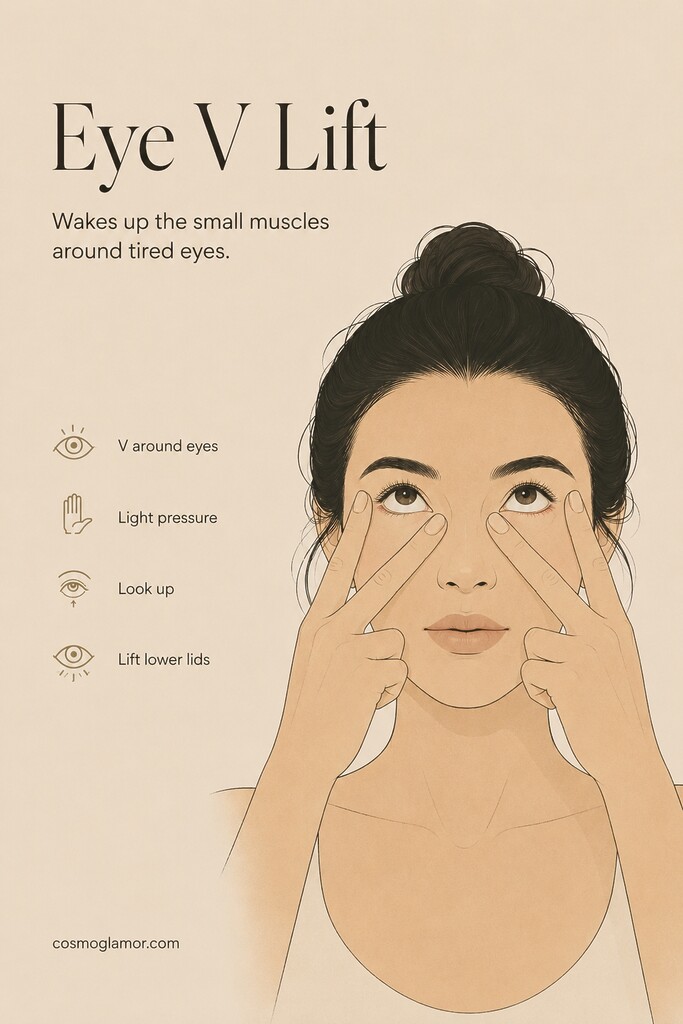
3. The Eye “V” Lift (Orbicularis Oculi)
Make a “V” shape with your index and middle fingers on both hands. Place your middle fingers at the inner corners of your eyes and your index fingers at the outer corners. Apply light pressure. Look up toward the ceiling and squint just your lower eyelids upward. You should feel the tiny muscles around your eyes working and shaking slightly.
Reps: Squint and release 10 times, then shut your eyes tightly for 10 seconds.
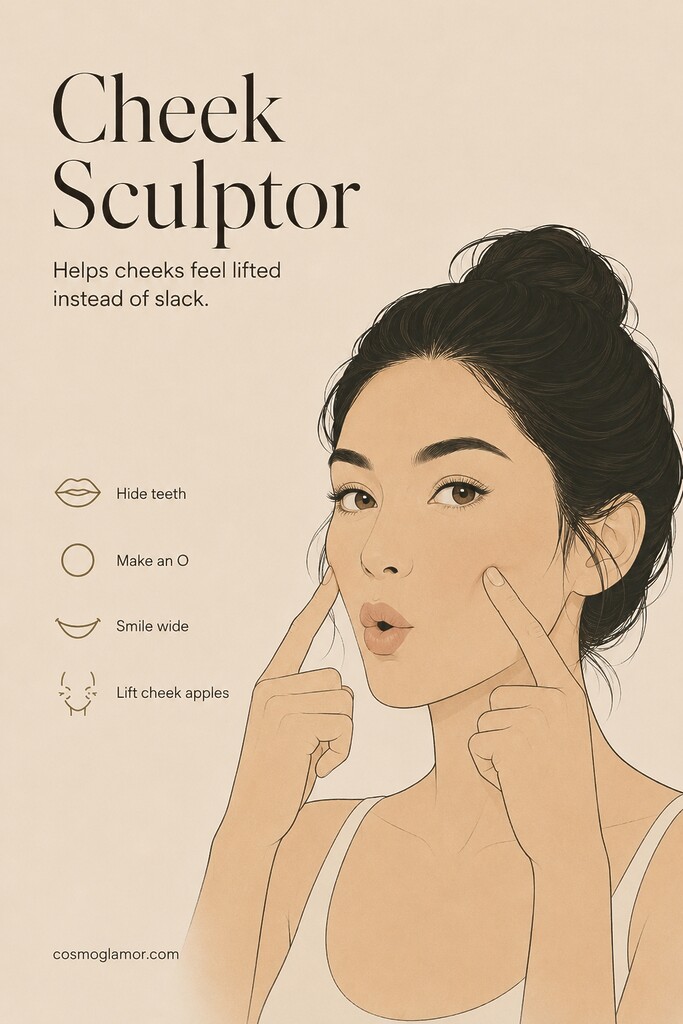
4. The Cheek Sculptor (Zygomaticus Major)
Hide your teeth with your lips to make an “O” shape with your mouth. Then, smile as widely as you can while keeping your teeth hidden. Place your index fingers lightly on the apples of your cheeks. Push your cheek muscles up toward your eyes while you smile, resisting the movement slightly with your fingers.
Reps: Hold the lifted smile for 10 seconds. Repeat 3 times.
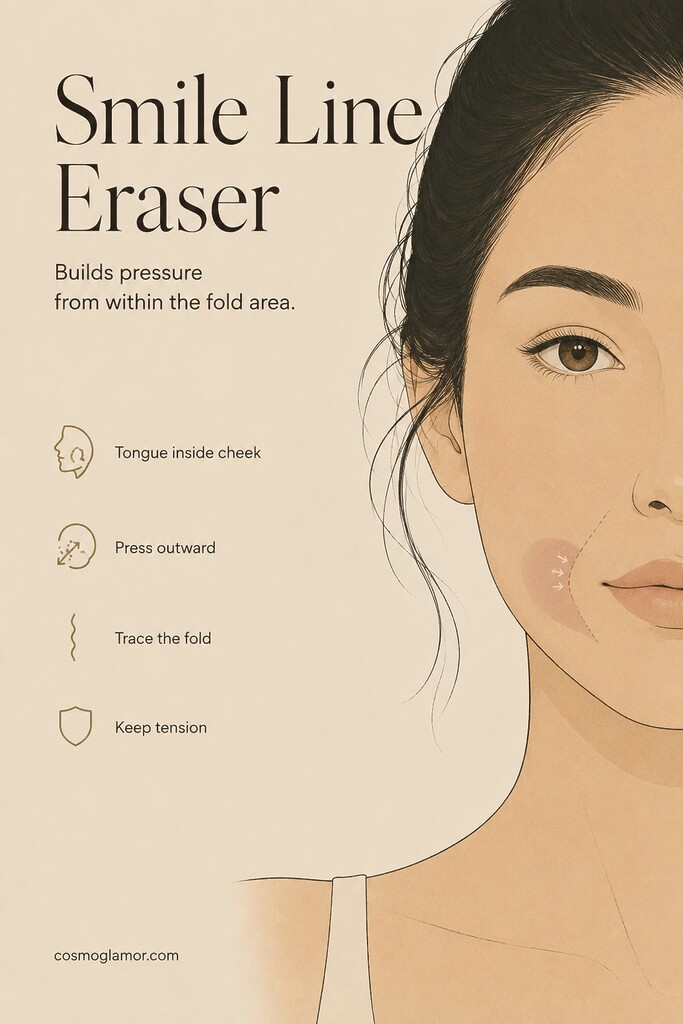
5. The Smile Line Eraser (Nasolabial Folds)
Place your tongue inside your mouth against your right cheek, right where your smile line forms. Push your tongue hard against the inside of your cheek, and use your cheek muscle to push back against the tongue. Slide the tongue all the way from the bottom of the fold up to your nostril, keeping the tension.
Reps: Trace the line from bottom to top 5 times on the right, then 5 times on the left.
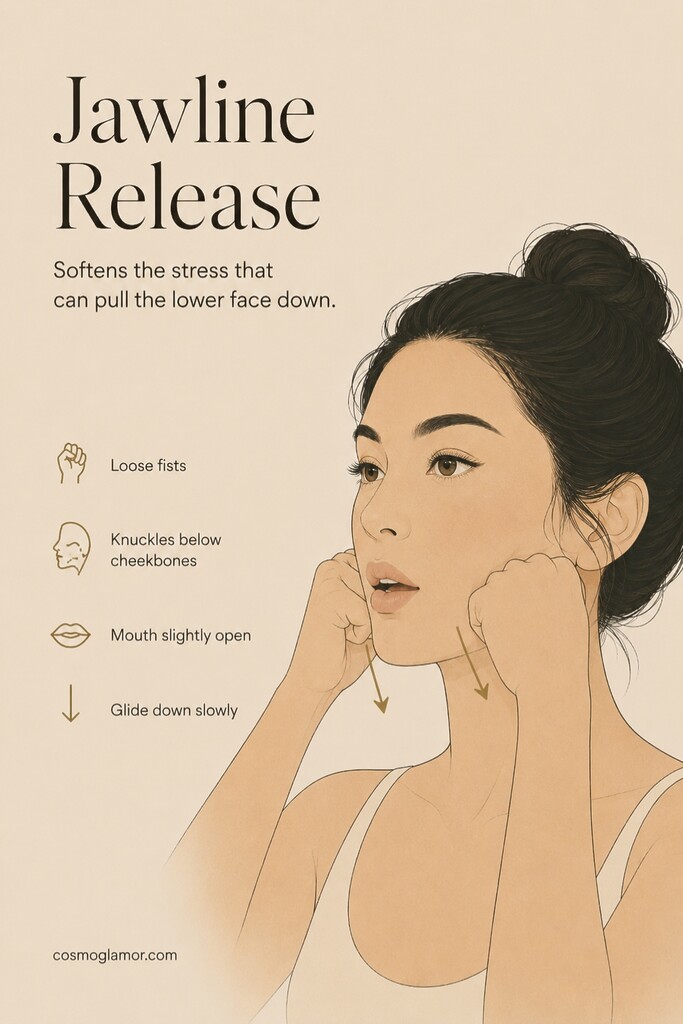
6. The Jawline Release (Masseter Muscle)
Most of us carry immense stress in our jaws, which pulls the lower face downward. Make a loose fist with both hands. Place the flat knuckles of your index and middle fingers right below your cheekbones, near your ears. Press in firmly and slowly slide your knuckles down to your jawline while opening your mouth slightly. Keeping the mouth open prevents you from accidentally clenching while you massage.
Reps: Slide down slowly 5 times.
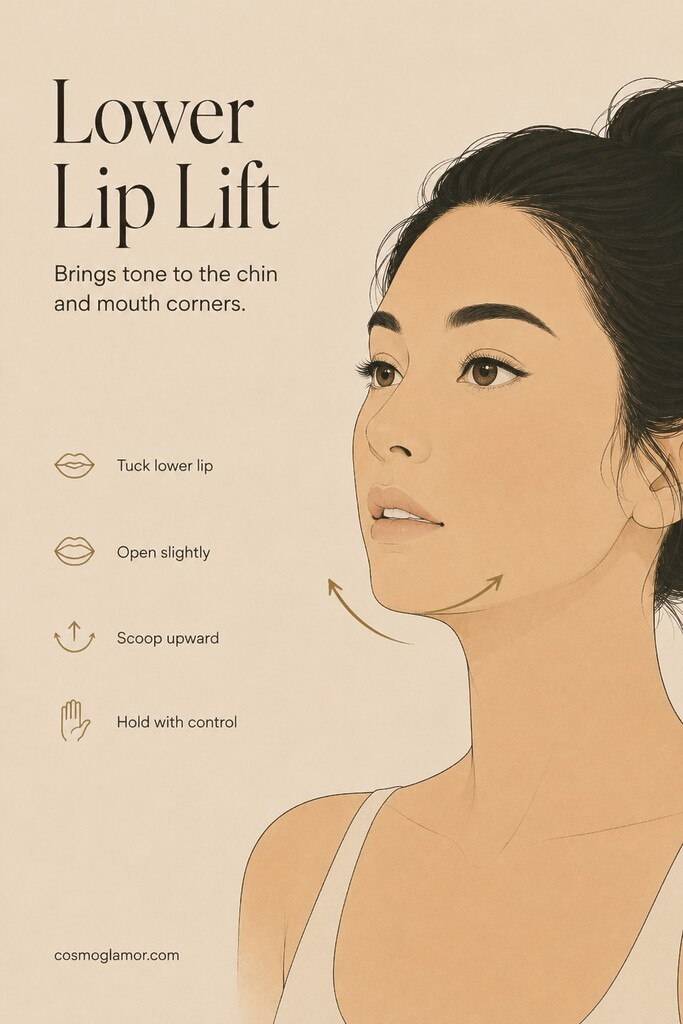
7. The Lower Lip Lift (Orbicularis Oris)
Tuck your lower lip over your bottom teeth. Open your mouth slightly, and scoop your lower jaw forward and up, as if you are trying to scoop water with your bottom lip. You will feel this intensely in your chin and the corners of your mouth.
Reps: Scoop up and hold for 5 seconds. Repeat 5 times.
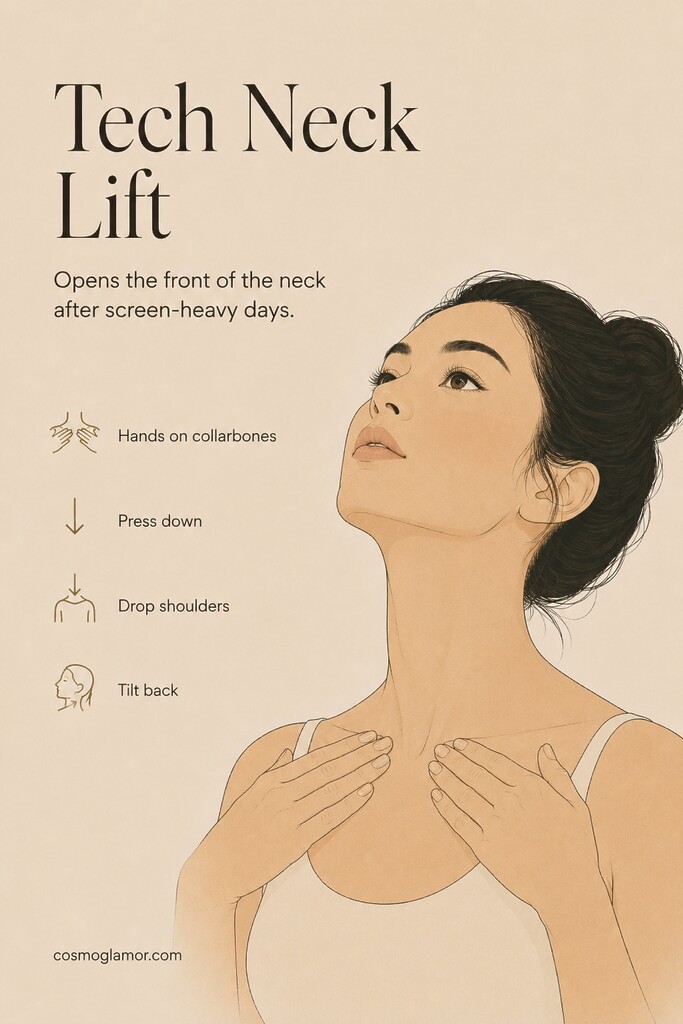
8. The Tech Neck Lift (Platysma)
Place both hands at the base of your neck, resting on your collarbones. Press your hands down firmly into your chest, drop your shoulders, and tilt your head back to look at the ceiling. Jut your bottom jaw out slightly until you feel a deep stretch in the front of your neck. Anchoring your collarbones with your hands ensures the stretch targets the platysma muscle instead of just hyper-extending your cervical spine.
Reps: Hold the stretch for 15 seconds. Repeat 3 times.
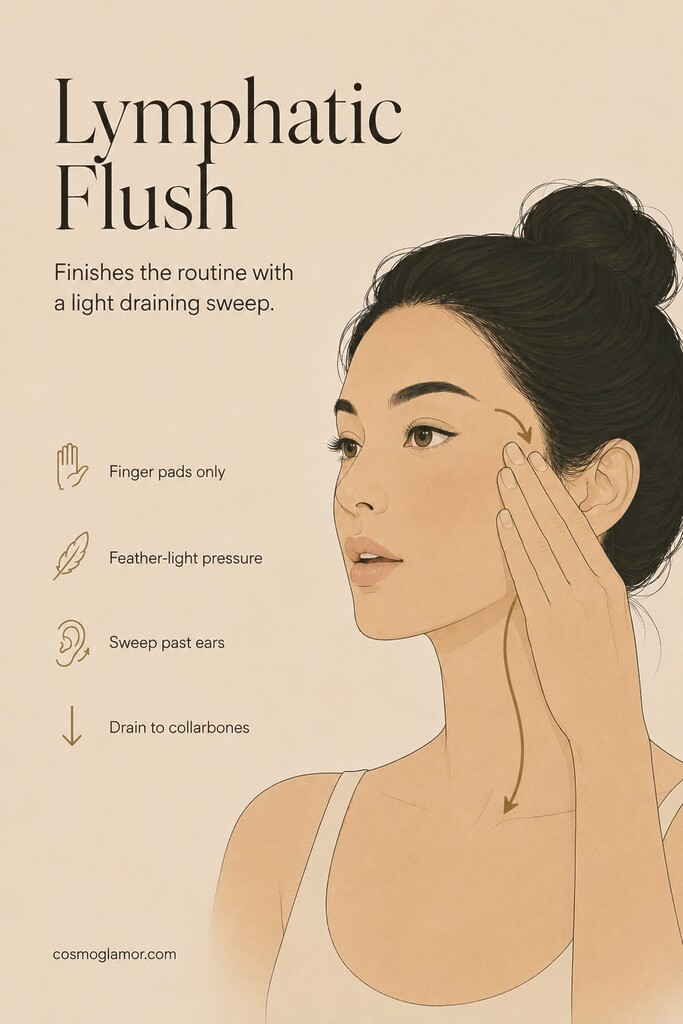
9. The Lymphatic Flush
Finish by draining the fluid you just moved around. Using the flat pads of your fingers, trace a light, sweeping path from the center of your forehead, out to your temples, down the sides of your face past your ears, and all the way down your neck to your collarbones. Use very light pressure here—the lymphatic system sits just under the skin, so pressing too hard bypasses it entirely.
Reps: Sweep 5 times.
Reader Friction: “Will this cause more wrinkles?”
This is the most common hesitation I hear, and it is entirely valid. The answer is no, provided you follow the golden rule: you must isolate the muscle, not pull the skin.
If you see folds forming under your fingers while you push, you are moving the skin, which contributes to elasticity loss over time. If your skin is dragging, you either need to apply more facial oil, press deeper into the bone, or slide less. The goal of facial exercises for wrinkles is to use your hands as dumbbells to create resistance, not as an iron to stretch your face out.
How Often Should You Do Face Yoga?
You need to sit in front of a mirror and do this for twenty minutes every single day. Actually, wait, no you don't. That kind of unrealistic pacing is why people quit wellness routines in the first week.
Five focused minutes is plenty. Aim for four to six days a week. It takes about four weeks of consistent practice for the muscles to begin retaining their new tone, and around eight weeks to see a visible lift in the mirror. Treat it exactly like going to the gym; you don't get a sculpted bicep after one workout, and your cheekbones operate on the same timeline.
Take a picture today in natural lighting, right before you start. Do the short routine while you drink your morning coffee or watch a show before bed. In a month, take another picture in that exact same spot, and see what the data tells you.