Fine hair has a frustrating habit of looking incredibly sleek right until I try to put it up. Then the ponytail looks like a pencil, and the messy bun disappears entirely. As a mom of three juggling school runs and a budget, I don't have the time or the money for extensions, and I certainly can't manage a professional blowout every morning. I just need a few reliable tricks that make my hair look twice as thick before I walk out the door. You do not need more hair to fix this. You just need better architecture.
Instead of a random list of 24 disconnected tips, I've organized the specific hacks and updos from these stylists into exactly how you'll use them in real life. Pick your category and skip right to the steps:
- The Morning Rush: Everyday Updos (Hacks 1–7)
- The Geometry: Shapes That Fake Fullness (Hacks 15–19)
- The Viral Illusions: Buns, Ponytails & Clips (Hacks 21–23)
- The Formal Fake-Out: Special Occasions (Hack 20)
- The Architecture: Prep, Hold, and Front Lift (Hacks 8–14 & 24)
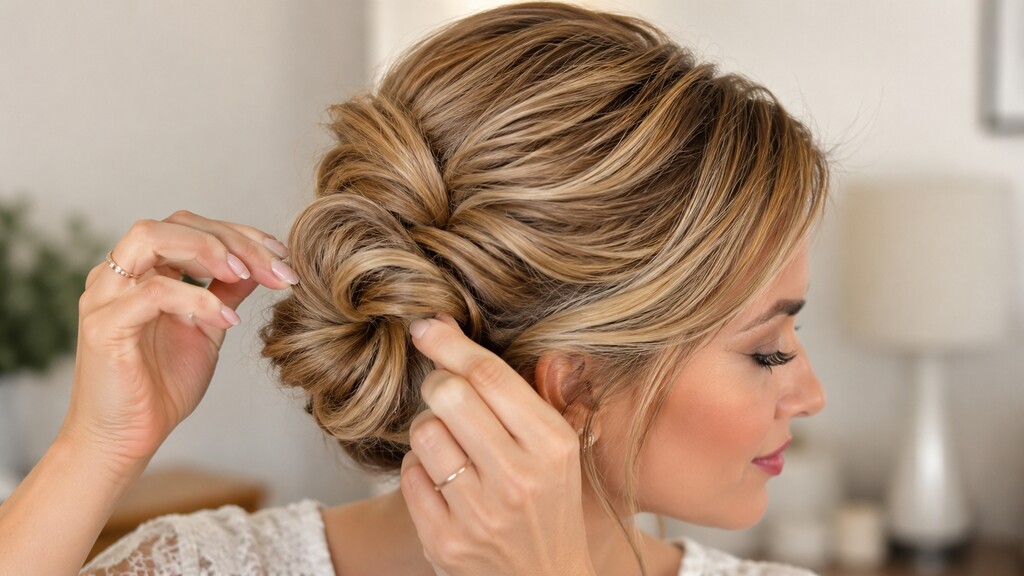
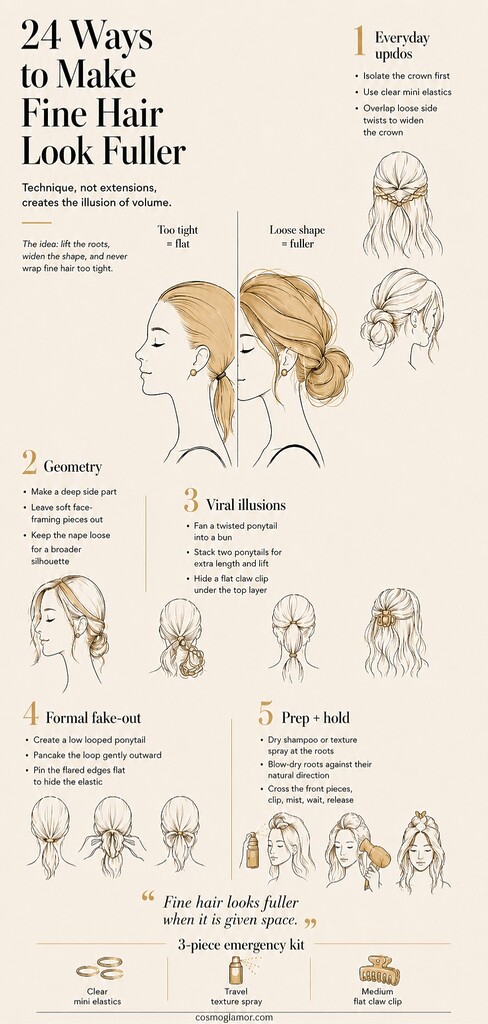
The Morning Rush: Everyday Updos
Most mornings, I grab a thick fabric hair tie and pull everything straight back. That compacts thin hair into the smallest possible shape, and the bulky elastic only highlights how little hair is actually inside it. The alternative is using small clear elastics and overlapping sections.
Lainey Ostrom demonstrates seven everyday styles that all rely on the same foundational trick: isolating the top section first. Here is how to execute the basic overlapping half-up, which covers the mechanics for the first seven hacks:
- Separate the crown section of your hair and secure it at the back with a clear mini elastic.
- Take a one-inch section of hair from the front right side, twist it loosely, and pull it back toward the elastic.
- Pin that twist directly over the elastic to hide it.
- Repeat on the left side, bringing the twist back and pinning it so it overlaps the first one.
Twisting the side pieces before bringing them up creates a woven effect that tricks the eye into seeing a much wider crown. The twists sit slightly raised off the scalp, preventing the hair from laying completely flat.
The Geometry: Shapes That Fake Fullness
Professional stylists do not just tease hair randomly. They think about where bulk needs to sit to balance your face. Justin Hickox explains the geometry behind hair volume, focusing on five specific styling shapes (Hacks 15 through 19) that completely change the visible weight of thin hair.
Adjusting your part alters how much hair appears on top of your head. A deep side part naturally stacks the majority of your hair on one side, building immediate body. Here is how to use that geometry to build a fuller foundation before tying your hair up:
- Using a tail comb, create a deep side part aligned with the highest arch of your eyebrow.
- Sweep the heavier side across your forehead to build an immediate swoop of volume.
- Pull out two or three thin, soft layers around your cheekbones before pulling the rest of your hair back.
- Keep the back of the style loose at the nape of the neck to maintain a wide, soft silhouette.
Leaving those deliberate, face-framing pieces out prevents the scalp from looking exposed, a common issue when fine hair is pulled straight back.

The Viral Illusions: Buns, Ponytails & Clips
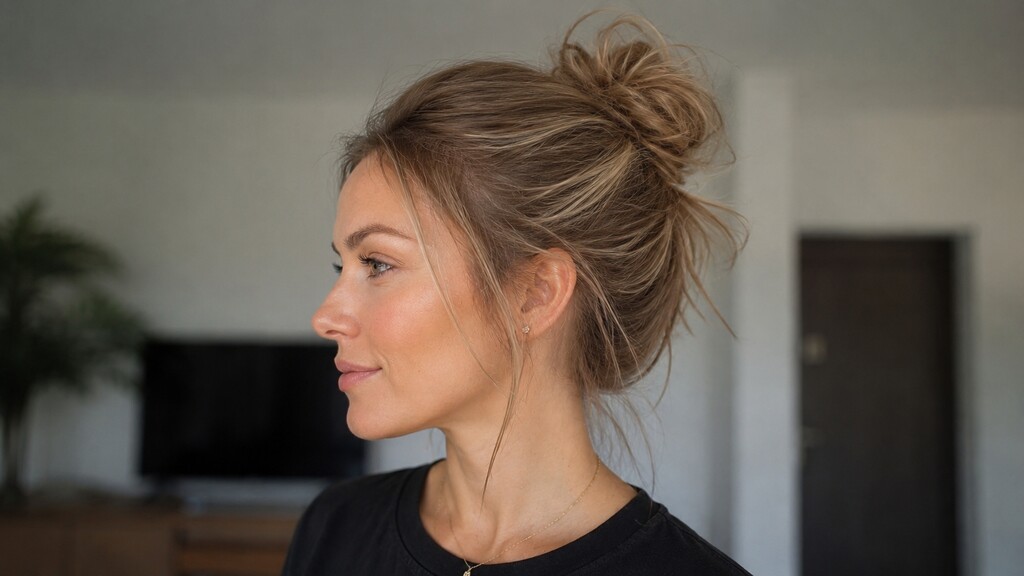
The standard messy bun usually results in a tiny knot for those with thinner hair. Wrapping the hair around the base compacts it. DIY Hairschool demonstrates a technique (Hack 21) that changes the physics of the bun entirely.
- Gather your hair into a high ponytail using a standard elastic.
- Instead of wrapping the tail around the base, twist the length of the hair loosely.
- Fan the twisted hair out directly over the top of the hair tie, spreading the strands like a mushroom cap.
- Use bobby pins around the edges to pin the fanned hair flat against your head.
For a standard ponytail (Hack 22), a single elastic often leaves the hair drooping. Stacking two ponytails creates a vertical cascade that looks twice as long.
- Divide your hair horizontally into a top half and a bottom half.
- Secure the bottom half into a mid-height ponytail.
- Secure the top half into a high ponytail directly above the first one.
- Slide two bobby pins vertically underneath the top elastic, pointing straight down toward your scalp.
Claw clips are notoriously difficult for fine hair because the plastic teeth often show straight through the sparse strands. Ashley Erickson Beauty shares a smart workaround (Hack 23) that uses the clip itself as a hidden volumizing tool.
- Gather your hair at the nape of your neck and twist it upward tightly against your head.
- Before clamping the clip over the twist, fold the loose tail end of your hair down over the exact spot you plan to place the clip.
- Open the clip, bite down on the twisted base underneath, and let the top layer of hair cascade completely over the structural teeth.
The bulky plastic of the clip props the thin hair up from underneath, forcing the strands to flare outward into a full-looking cascade.
The Formal Fake-Out: Special Occasions
Formal events used to make me feel like I had to buy clip-in extensions to achieve a complicated look. This looped chignon hack (Hack 20) builds an intricate low bun right at your own bathroom mirror.
- Start pulling your hair into a low ponytail.
- On the final pass of the elastic, pull the hair only halfway through to create a loop.
- Carefully pinch the outer edges of that loop and pull them outward (pancaking).
- Pin the stretched, flared edges flat to your head, arranging them to hide the elastic.
Pancaking the hair stretches the visible surface area. Because you are flattening the loop against the curve of your head, the hair covers twice as much space without requiring any extra density.
The Architecture: Prep, Hold, and Front Lift
An updo is only as strong as its base. If your hair is perfectly smooth when you start pinning, the style will slide down your neck by lunchtime. Glam Girl Gabi breaks down the prep steps (Hacks 8-14) that make a style hold.
Focus your texturizing products at the root. A targeted blast of dry shampoo gives bobby pins something to actually grab onto. When blow-drying, push your roots in the opposite direction they naturally lay. The heat breaks down the temporary bonds in the hair, and letting it cool in that lifted position sets the new, upright shape.
But all the bulk in the back matters very little if the front sits flat against your forehead. Erin Dugan Jurchak tests a root-lifting trick (Hack 24) that frames the face perfectly.
- Take the two front framing pieces of your hair.
- Pull the left section to the right, and the right section to the left, crossing them over each other.
- Clip them flat in this crossed position against your head.
- Apply a light mist of hairspray and wait five minutes before un-clipping.
The secret to fine hair volume is never wrapping it tight. You have to give the strands permission to take up space.
Frequently Asked Questions
Will pancaking and fanning out my hair damage the ends?
Pulling gently on the edges of a loop or braid won't cause breakage as long as your hair is completely dry and you are pinching small sections. If you feel resistance, loosen your grip. Avoid doing this on wet hair, which snaps easily when stretched.
My hair is too clean and slippery. What should I do?
Freshly washed fine hair is the enemy of a lasting updo. If you must wash it the same day, spray dry shampoo or a dry texturizing spray directly onto the roots and mid-lengths before you even pick up a hair tie. The added grit acts like a primer.
How do I stop bobby pins from sliding out?
Always insert the bobby pin with the wavy side facing down against your scalp, not pointing up. Before sliding it in, lightly mist the pin itself with hairspray. That tiny bit of tackiness locks the metal against your fine hair.
My 3-Piece Fine Hair Emergency Kit
I keep these three items in my bag at all times. If a style starts to deflate halfway through the day, these fix it in under a minute without needing a mirror:
- Clear polyurethane mini elastics: Standard fabric ties slide down thin ponytails. Polyurethane grips the hair shaft and stays exactly where you put it.
- A travel-size dry texture spray: Not hairspray. Texture spray adds invisible scaffolding when my roots start looking flat around 3 PM.
- A medium-sized, flat claw clip: When all else fails, twisting the hair up and letting it cascade over a flat clip instantly fakes a full, polished look.
- Save for Later17.3K


12 Responses
I’ve always struggled with updos because my hair is so fine. It just slips right out of any style I try! Any tips for making updos actually stay put in thin hair?
Hi Olivia, I totally understand the struggle! Fine hair can be slippery. Here’s what I’ve found helps:
Texture is Key: Start with day-old hair or use dry shampoo to add some grip. The added texture will help the style hold. The “Wave Hello to Volume” and “Dry Shampoo Magic” sections in the article give some great tips on this, too!
Bobby Pins are Your Best Friend: Use plenty of bobby pins, and make sure they’re the kind with a good grip. Crisscrossing them in an “X” shape can also help create a more secure hold.
Hairspray is Essential: A light-hold hairspray can help set the style without making it stiff.
Don’t Over-Brush: Once you’ve created your updo, resist the urge to keep brushing or adjusting it. This can loosen the style and make it more likely to fall out.
Try out the “Easy 3-Minute Updo for Short Hair” or one of the claw clip hairstyles – they’re designed with fine hair in mind. You might be surprised at how well they hold!
I’m growing out my hair, and it’s at that awkward shoulder length where it’s hard to style. Are there any updos that are particularly good for that in-between stage?
Hi Sophia, Shoulder-length hair is actually super versatile for updos! The article highlights a whole section on shoulder-length updos, so you’re in luck. Here are a few ideas that work well for that length:
Low Twisted Bun: A low bun with some twists or braids incorporated can look elegant and is easy to do with shoulder-length hair.
Half-Up, Half-Down: This is a classic for a reason! It’s a great way to keep your hair out of your face while still showing off your length.
French Twist: A French twist can be adapted for shoulder-length hair and looks super sophisticated.
Claw Clip Styles: A small or medium claw clip can be used to create a variety of quick and easy updos.
Erin Elizabeth’s “3 Quick and Easy Hairstyles for Fine Hair” and Glam Girl Gabi’s “7 Easy Hairstyles for Greasy Hair” videos in the article are perfect resources for you. They offer some great visual tutorials for shoulder-length styles. Don’t be afraid to experiment and see what works best for you!
This is a nice collection of updos! I have very fine, thin hair, and my biggest problem is that updos tend to look flat and lifeless on me. The tips about teasing and dry shampoo are helpful, but I’m wondering if there are any specific products or tools recommended for thin hair that can help create more volume and hold without weighing it down? I’ve tried some volumizing sprays that just make my hair feel sticky.
Hi Kimberly, thanks for your comment! I understand the struggle with flat updos on fine hair. It’s all about finding the right products that add volume and hold without that sticky or heavy feeling. Here are a few recommendations:
Lightweight volumizing mousse: Apply a small amount to damp hair before styling. Look for alcohol-free formulas to avoid drying out your hair.
Texturizing spray: This is a great alternative to hairspray for creating grip and hold without stiffness. It adds texture and volume that lasts.
Root-lifting spray: Apply this directly to your roots before blow-drying or air-drying to create lift at the crown.
Velcro rollers: These are great for adding volume at the roots without heat damage. Use them on dry hair for about 10-15 minutes before styling.
Bobby pins designed for fine hair: These are often smaller and have a rubberized coating to prevent slipping.
It’s also important to avoid heavy creams or serums, as they can weigh down thin hair. Experiment with different products to find what works best for your hair type. Thanks for bringing up this important point!
I appreciate the inclusion of videos in this article! It’s much easier to visualize the hairstyles when you can see them being done. My hair is shoulder-length and very thin, and I often find that styles that look great on thicker hair just don’t translate well. Are there any specific updos from the videos mentioned or general tips for shoulder-length thin hair that you’d recommend? I’m looking for something that’s elegant but not too complicated.
Hi Michelle, I’m glad you found the videos helpful! Visuals are definitely key when it comes to hairstyles. For shoulder-length thin hair, here are a few recommendations based on the videos and some general tips:
Focus on texture: Adding waves or curls, as mentioned in the “6 Hacks to Boost Volume” section, is crucial for creating the illusion of thickness.
Try the “3 Quick and Easy Hairstyles for Fine Hair” by Erin Elizabeth: These styles are specifically designed for fine hair and are quick to do, making them perfect for everyday wear or a last-minute event. The twisted ponytail and the messy bun with volume are particularly good for shoulder-length hair.
Consider half-up styles: These styles can create volume at the crown while leaving some hair down, making it look fuller. A half-up bun or a twisted half-updo would work well.
Use accessories: Hair accessories like barrettes, clips, or headbands can add visual interest and help to hold the style in place.
For an elegant but not too complicated look, I’d suggest trying a low twisted bun or a French twist. These styles are relatively easy to do and can look very sophisticated. Remember to tease your hair at the roots for extra volume before styling. Thanks for your question!
Okay, I’ll bite. I’ve got hair thinner than a supermodel’s patience, and I’m always on the hunt for updo ideas. But seriously, air-drying? In this economy? Who has time for that?! I feel like I’d be waiting for my hair to dry until next Tuesday. Also, the ‘switch it up’ part for the hair part – won’t that just make me look like I got dressed in the dark? Any tips for us time-crunched, thin-haired ladies?
Brenda, I hear you! Air-drying can feel like an eternity, especially when you’re on a schedule. If you’re short on time, a quick blast with the hairdryer on a cool or low-heat setting can speed things up without causing too much damage. As for the part-switch, it’s more subtle than you think! Just a slight shift can add volume. Think of it as a mini hair makeover, not a full-on disguise. 😉 You can also try a volumizing mousse or spray at your roots before drying to give your hair that extra oomph! Let me know if you try these out!
I’m all for embracing natural texture, but my thin hair just falls flat no matter what I do. That Mallory Brooke updo looks cute, but I’m skeptical it would work on hair as fine as mine. And teasing? Isn’t that, like, super damaging? I’m picturing a bird’s nest situation. Also, are all these claw clip hairstyles really going to hold? My hair tends to slip out of everything. Help a sister out!
Tiffany, I understand your skepticism! Fine hair can be a challenge, but don’t lose hope. For the Mallory Brooke updo, try using a texturizing spray or dry shampoo before you start to give your hair some extra grip. As for teasing, the key is to be gentle and use a fine-tooth comb, not a brush. Start a few inches from the roots and backcomb in small sections. And claw clips can definitely work! Look for ones with strong springs and maybe some little teeth inside for extra grip. You can also secure your style with some bobby pins discreetly placed for added hold. Don’t be afraid to experiment! You might be surprised at what your thin hair can do. 😊