Most vintage hair tutorials start with a subtle, frustrating assumption: that you already possess three hours of free time and a thick, manageable mane of hair. If you are trying to get out the door on a Tuesday morning, intricate 1940s pin-ups often feel like a museum exhibit rather than a realistic styling choice.
But the secret to retro hair isn't perfect historical accuracy or a specific haircut. It is entirely about the silhouette. Once you know how to build a little volume at the front or anchor a roll in the back, you can fake the vintage aesthetic no matter where your ends fall. You don't need a styling team. You just need a few strategic bobby pins, a decent hairspray, and a little bit of geometry.
Short Hair: Building Shape and Volume
Having a bob or a pixie cut doesn't lock you out of retro styling. In fact, short hair is often easier to mold into a classic 1950s shape because the weight of the hair isn't constantly pulling the curls down.
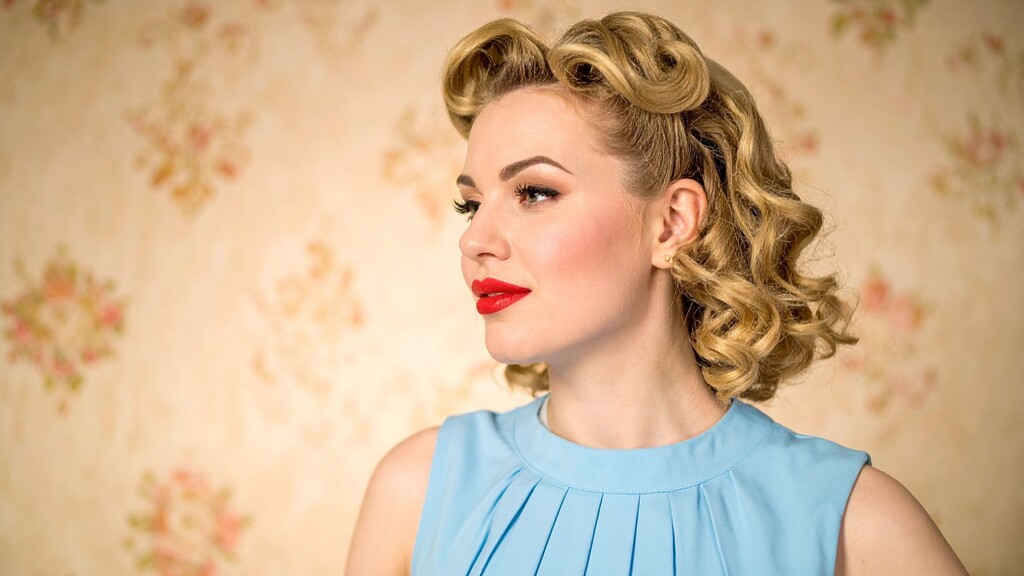
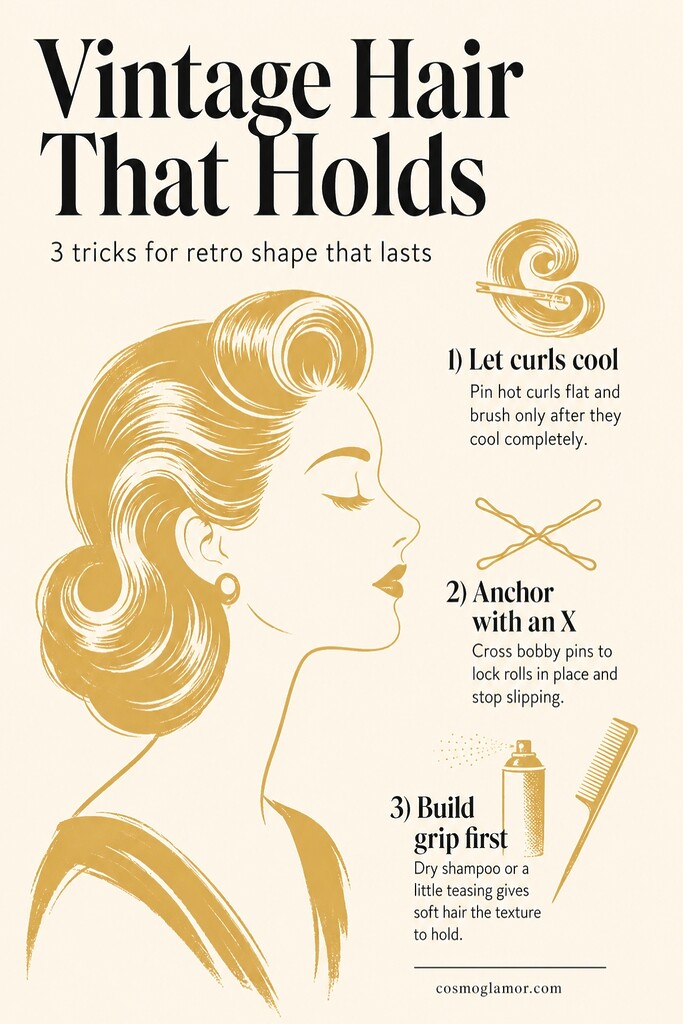
If you want that iconic Marilyn Monroe bounce, the trick is focusing your effort on the front sections. A 3/4-inch or 1-inch curling iron and a heat protectant will get you most of the way there, but the real magic happens in the setting. Once you release a hot curl from the iron, immediately pin it flat against your scalp with a metal clip to cool. Always let hot curls cool completely before you run a boar bristle brush through them. Hair sets its structural shape as the temperature drops, so brushing warm hair guarantees the curl will fall flat within an hour.
For a slightly softer approach, you can create a 90s-meets-50s half-updo. This is brilliant for second-day hair. By using medium hot rollers and teasing the crown slightly before securing the top half backward with two interlocking hair combs, you create a lifted silhouette that feels vintage but wears like a modern, comfortable style.
Medium Hair: The Art of the Roll
Shoulder-length hair is arguably the sweet spot for vintage styles. It is long enough to twist and pin, but short enough that you don't end up with massive, heavy coils that cause a headache by noon.
The defining feature of 1940s hair is the roll. Instead of letting hair hang loose, the ends are tucked upward and inward. You can achieve this by backcombing the mid-lengths slightly to give the hair some internal scaffolding. Wrap the ends of your hair around two fingers to form a loop, roll that loop upward until it sits flat against your head, and lock it in place with bobby pins. Cross your bobby pins in an X shape when securing heavy sections. The ridges of the pins interlock, creating an anchor that won't slide down fine hair.
If you prefer your hair entirely out of the way, a retro glamorous updo is incredibly practical. You just roll sections of the hair upward from the nape of the neck and secure them flat against the head. Because this method builds the style piece by piece, it doesn't matter if you have layers or an uneven cut. You just tuck the stray ends into the center of the roll as you go.
Vintage Hairstyles for Long Hair: Taming the Length
Long hair gives you plenty of material to work with, but the sheer weight of it is the enemy of vintage volume. If you try to create a standard 1940s victory roll with 22 inches of hair, you usually end up with something resembling a heavy croissant sitting on your forehead.
The workaround is to rely on styling aids. An elasticated sponge roll (often called a hair rat) is a game-changer here. You wrap the ends of your hair around the sponge, roll it tightly down toward your scalp, and secure it by sliding bobby pins directly through the hair and into the sponge itself. This locks the tool to your head and gives you massive, structured height at the front without requiring a hundred pins.
If you want something faster, lean into pin-up basics. A front roll or a side-swept look anchored by a wide hair ribbon takes only minutes once you get the hang of it. They hold up surprisingly well, even if you spend your morning wrestling a Golden Retriever before you manage to drink your coffee.
For those days when you just cannot be bothered with heat tools, lazy vintage styles are a lifesaver. Faux bangs (made by rolling a front section of hair forward toward your forehead and pinning it invisibly from underneath) instantly read as retro but require almost zero technical skill. The same goes for simple milkmaid braids crossed and pinned over the crown.
Common Friction Points (And How to Fix Them)
Even with the best tutorials, getting hair to behave is rarely a frictionless process. Here is how to handle the most common vintage styling roadblocks.
- My rolls keep sagging after an hour. This happens when the hair is too clean and slippery. Spray dry shampoo onto your roots and mid-lengths before you start twisting. The powder absorbs oil and creates a matte texture, giving the hair enough grip to hold a shape.
- I have incredibly thin hair, and rolls just look flat. Don't try to use your hair to build the structure. Lightly tease the underside of the section, smooth the top layer, and use a small foam insert or hair rat. It fakes density instantly.
- I hate sleeping in pin curls. You don't have to. Set your hair with hot rollers in the morning while you eat breakfast. As long as you let them cool entirely on the head before unrolling, you will get enough structure to build a solid updo for the day.
The secret to retro hair isn't perfect historical accuracy. It is entirely about the silhouette.
Pick one element: a swept bang, a pinned roll, or a classic ribbon. Practice it until you can do it without looking in the mirror. 📚