A Dutch braid looks intricate, but the mechanics are surprisingly straightforward. Once your fingers learn the basic underhand pattern, you have a style that holds securely through workouts, errands, and humid afternoons. Let's break down how to make this work for whatever length you have right now.
Jump to the 25 Dutch braid hairstyles
The Underhand Rule: How a Dutch Braid Works
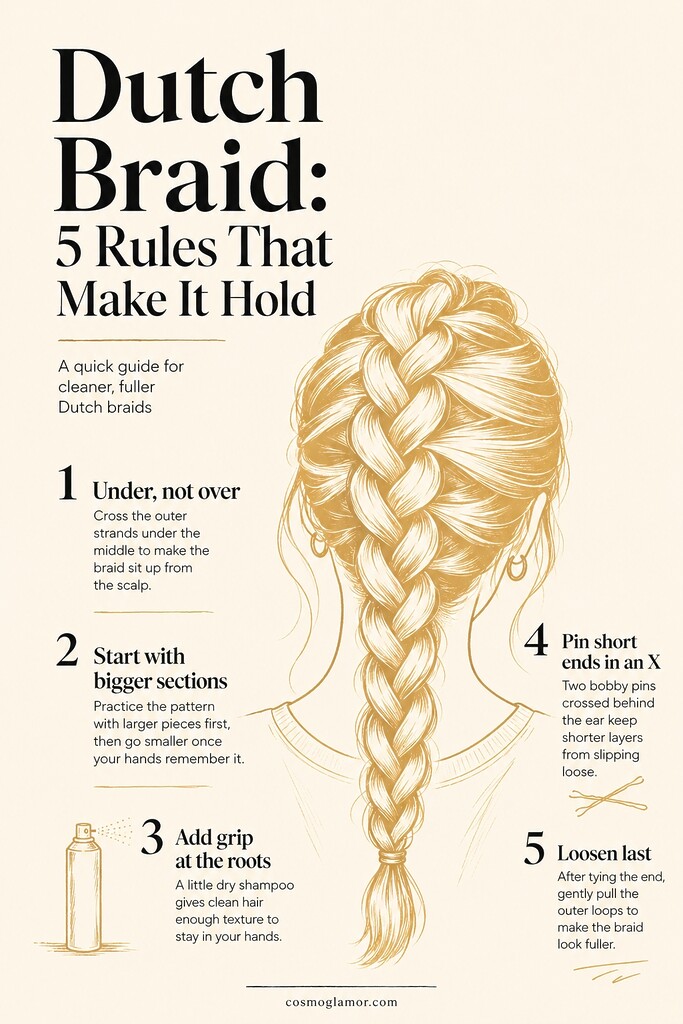
If your fingers default to a French braid, you only need to change one rule to get this right. Pass the outside strands under the middle strand instead of over.
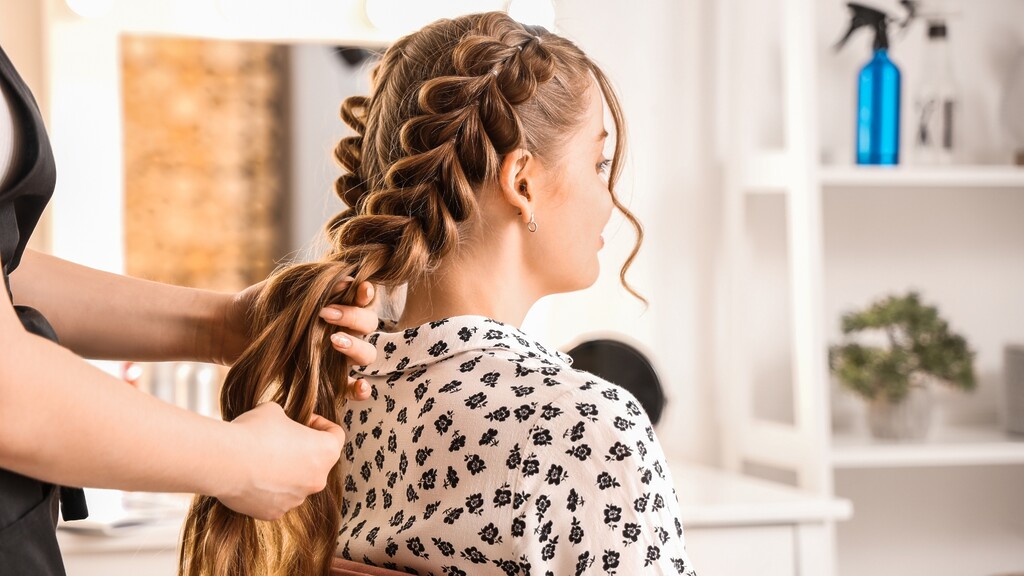
Pulling the hair underneath pushes the main braid up and out. This creates a signature 3D pop that sits on top of the hair rather than blending into it. 📌 Start practicing with larger sections of hair to build muscle memory before trying to weave tiny, intricate details.
You might worry that your hair is too clean and will just slip out of your hands. Lightly coat your roots with dry shampoo before you start. The added grit gives the strands something to hold onto, keeping your tension tight while you weave.
The 25 Dutch Braid Hairstyles by Length
Short Hair: Bobs, Lobs, and Pixies (Styles 1–5)
Short hair absolutely works for this technique. Because the braid sits on top of the scalp, you can grab much shorter pieces than you could with a traditional French braid.
1. The Side Sweep Braid. Part your hair deeply to one side and weave a single Dutch braid down the heavier side. Pin it behind your ear with two bobby pins placed in an X shape. The crossed pins lock into each other, stopping the short ends from sliding out by midday.
2. The Half-Up Crown. Take a small section above each temple, braid them straight back, and tie them together at the crown with a clear elastic. This pulls growing-out bangs completely out of your eyes without needing a full updo.
3. Micro Double Braids. Part down the middle and create two tiny braids using only the front inch of your hairline. Stop braiding just behind the ear and secure with small elastics for a structured face-framing look.
4. The Pixie Accent. You only need two inches of hair for this. Grab a small chunk right at the front hairline, Dutch braid it for three cross-overs, and pin it flat against your scalp. ✨ Slide a decorative metal clip directly over the bobby pin to hide the mechanics.
5. The Floral Finish. Braid a single section from your part down to the nape of your neck, gathering all loose ends. Secure it with a sturdy jaw clip or floral accessory. The heavy clip adds necessary weight to keep the shortest bottom layers pinned down.
Medium Hair: Shoulder-Length Versatility (Styles 6–15)
Shoulder-length hair is the sweet spot for braiding. You have enough length to create volume but not so much that your arms get exhausted holding it up.
6. The Classic Double Dutch. Part your hair straight down the middle and braid both sides all the way to the ends. Pulling the sections tight at the nape of your neck prevents the braids from bagging out in the back before you tie them off.
7. Double Braids to Low Buns. Follow the classic double style, but stop braiding at the nape of your neck and secure with elastics. Twist the remaining tail ends tightly, wrap them into two messy buns, and pin them down.
8. The Single Low Ponytail Braid. Weave one large Dutch braid straight down the center of your head, stopping exactly at the base of your skull. Tie it off into a low ponytail. I rely on this specific style when I need my hair completely out of my face to walk my golden retriever, Barnaby, before the morning rush begins.
9. Half-Up Top Knot. Dutch braid the top center section of your hair backward, stopping at the crown. Secure with an elastic, then twist the tail into a tight top knot. Leaving the rest of the hair down naturally balances the height of the bun.
10. The Headband Braid. Start behind one ear and braid across the top of your hairline to the other ear. Pin the tail tightly flat against your head, then comb a layer of loose hair over the pin so the braid looks like a continuous, natural headband.
11. Messy Crown Wraparound. Create two loose Dutch braids on either side of your head. Wrap them around the back of your head, overlapping the ends. Tuck the tail of the left braid under the right braid, and pin them securely into place. This completely hides the ends and is an excellent way to mask greasy roots.
12. The Asymmetrical Side Braid. Braid down one side of your head, gathering all the hair from the opposite side across the nape of your neck as you go. You get a thick, chunky braid that rests securely over one shoulder.
13. Three-Strand Combo. Start with a tight Dutch braid at the top of your head. Once you hit the nape of your neck and run out of new hair to add, seamlessly transition into a standard three-strand braid down to the ends. It gives the scalp structure while leaving the ends flexible.
14. Dutch Pigtails. Keep the braids high and tight on the sides of the head. Stop braiding exactly at the earlobes, tie them off with standard hair ties, and let the rest hang as fluffy pigtails.
15. The Faux Undercut. Create three tiny, extremely tight Dutch braids right above one ear, pulling the hair straight back toward the crown and pinning them flat. Flip the rest of your hair voluminously over to the opposite side to mimic a shaved undercut.
Long Hair: Volume and Drama (Styles 16–25)
Long hair gives you the material to create massive, intricate-looking styles. The challenge here is managing the weight and keeping the tension consistent all the way down.
16. The Upside-Down Dutch Braid. Flip your head forward and brush your hair smooth. Start braiding from the nape of your neck up toward your crown. Tie it off into a high messy bun. Working with gravity instead of against it makes it much easier to keep the heavy back sections completely smooth.
17. The Pancaked Single Braid. Braid straight down the back and secure with an elastic. Gently pinch and pull on the outer edges of each weave, starting from the bottom and working your way up, to pull the braid wider.
The secret to a thick, prominent braid is never the amount of hair you have. It is how much you loosen the outer loops after tying the elastic.
18. Double Braids to High Ponytail. Braid two sections up from the front hairline, stopping at the crown. Gather those braids and the rest of your loose hair into one high ponytail. 📌 Wrap a small piece of hair around the elastic and pin it underneath to hide the band and instantly upgrade the look.
19. Space Buns. Create two Dutch braids starting from the nape of the neck up to the crown. Tie them off with elastics, then tightly twist the remaining tails around the base of the bands into two high mini top knots. Secure each bun with three to four bobby pins.
20. The Hair Cuff Braid. Weave a standard double Dutch braid down to the ends. Open metal hair cuffs and clamp them evenly down the center of the weaves. The metal accessories physically break up the heavy texture of very long hair.
21. Side Bun Updo. Braid two Dutch braids diagonally across the back of your head, directing both to finish right behind one ear. Twist both braided ends together into a low circular bun and pin it flat against the scalp.
22. The Half-Up Waterfall. Start a Dutch braid horizontally across the back of your head. With each new weave, drop the bottom strand completely so it falls naturally, and pick up a new strand of hair from directly underneath it to continue the pattern. It creates a cascading, woven effect over your long layers.
23. Fishtail Dutch Combo. Start with a loose Dutch braid at the crown. Once you reach the nape of your neck, secure it with a small clear elastic. Split the remaining loose ponytail into two even sections. Pull tiny pieces from the outside of the left section over to the inside of the right section, repeating all the way down to create a fishtail finish.
24. The Elastic-Style Braid. Dutch braid down to the nape of your neck and secure with a strong hair tie. Place clear elastics every three inches down the remaining loose tail. Gently pull the hair between each elastic outward to create a rounded “bubble” effect, blending a classic braid with a trendy finish.
25. The Elegant Bridal Updo. Braid the front sections loosely, gather them at the low back, and tie them together. Roll the long hanging ends upward toward the nape of your neck, tucking them under the braid. Secure heavily with U-shaped hairpins for a seamless, formal updo.
Common Braid Questions
Why do my layers keep poking out of the braid?
Layers slip out when you pull sections straight down or away from your head while braiding. Keep your hands flat against your scalp and pull the hair in the exact direction you want the final braid to lay. If a layer pops out, tuck it back in immediately and mist it with hairspray before moving to the next crossover.
Does Dutch braiding cause a headache?
A tight braid can cause tension at the root. If you feel immediate pulling, you are grabbing sections that are too large and dragging them from too far away. Take smaller, localized sections of hair so each weave only supports the hair immediately next to it.
Grab a handful of bobby pins, give your roots some dry shampoo, and see which style holds up best on your next busy morning.